How to Repair a Broken Vacuum Cleaner: Step-by-Step Troubleshooting & Maintenance Guide
Introduction
A vacuum cleaner is an essential household appliance, keeping floors clean and dust-free. However, like any machine, it can break down over time. Instead of rushing to buy a new one or spending money on professional repairs, learning how to fix a broken vacuum cleaner can be a cost-effective solution. Many common vacuum cleaner problems, such as suction issues, brush roll malfunctions, or motor failures, can be resolved with simple troubleshooting steps.
This vacuum cleaner repair guide will walk through DIY vacuum cleaner repair, helping homeowners identify issues, replace faulty parts, and maintain their vacuum for long-term performance. Whether it’s a vacuum cleaner not working, overheating, or making loud noises, this guide offers practical fixes. By following preventative maintenance tips, users can prolong their vacuum’s lifespan and avoid frequent breakdowns. Let’s dive into the step-by-step process to bring a broken vacuum back to life.
1. Common Vacuum Cleaner Problems and Their Causes
A vacuum cleaner not working can be frustrating, especially when it’s needed for daily cleaning. However, most vacuum cleaner problems have simple causes that can be easily fixed with the right approach. This section will cover the most frequent issues and explain why they happen, helping users perform DIY vacuum cleaner repair before considering professional help.
1.1 Vacuum Cleaner Not Working: Power Issues, Motor Failure, or Wiring Problems
One of the most common vacuum cleaner problems is when it simply won’t turn on. A non-functioning vacuum can be caused by several factors, including power supply issues, a faulty motor, or damaged wiring.
Causes:
- Power Cord Damage – A frayed or broken power cord can prevent the vacuum from receiving electricity.
- Blown Fuse or Tripped Circuit Breaker – If the vacuum suddenly stops working, the issue might be with the home’s electrical supply.
- Faulty On/Off Switch – A broken power switch can prevent the vacuum from turning on.
- Burned-Out Motor – If the motor overheats frequently, it may fail completely, requiring a vacuum cleaner motor repair.
- Internal Wiring Issues – Loose or broken wires inside the vacuum cleaner can prevent it from functioning properly.
Fixes:
- Check the power supply – Ensure the vacuum is properly plugged in and test a different outlet.
- Inspect the power cord – If it’s damaged, replace it immediately to prevent electrical hazards.
- Test the motor – If the vacuum turns on but doesn’t run smoothly, it might need a repair vacuum cleaner motor guide.
- Examine the wiring – Open the vacuum and look for any loose or disconnected wires.
1.2 Vacuum Cleaner Suction Issues: Clogged Hose, Dirty Filters, or Full Dustbin
A vacuum cleaner losing suction is a common issue that makes cleaning inefficient. Without proper suction, the vacuum won’t pick up dirt and debris effectively.
Causes:
- Clogged Hose – Dust, pet hair, and small objects can block the vacuum hose, restricting airflow.
- Dirty or Clogged Filters – A neglected filter can reduce the suction power significantly.
- Full Dustbin or Bag – An overfilled dustbin or vacuum bag can cause vacuum cleaner suction issues.
- Leaks in the Hose or Seals – Small cracks or holes in the vacuum hose can reduce suction power.
Fixes:
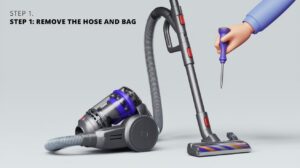
- Check the hose – Remove the hose and inspect for blockages. Use a broomstick or compressed air to clear debris.
- Clean or replace the filter – Wash reusable filters regularly and replace disposable ones as needed.
- Empty the dustbin – Regularly empty the dust container or replace the vacuum bag when full.
- Inspect for leaks – If the hose or seals are damaged, they should be replaced.
1.3 Vacuum Cleaner Brush Not Spinning: Belt Issues or Jammed Roller
If the vacuum cleaner brush roll stops spinning, it will struggle to pick up dirt, especially from carpets. A non-spinning brush usually indicates a belt issue or an obstruction.
Causes:
- Broken or Loose Vacuum Cleaner Belt – The belt is responsible for turning the brush roll. If it’s snapped or stretched, the brush won’t spin.
- Jammed Brush Roll – Hair, strings, and debris can wrap around the brush roll, preventing it from moving.
- Motor or Electrical Failure – If the brush roll is powered by a separate motor, it might have electrical issues.
Fixes:
- Inspect the vacuum cleaner belt – If it’s worn out or broken, perform a vacuum cleaner belt replacement.
- Remove debris from the brush roll – Use scissors to cut away tangled hair and dirt.
- Check the motor connection – If the brush roll motor isn’t receiving power, it may need repairs.
1.4 Loud Noises or Overheating: Motor Strain, Debris Blockages, or Faulty Components
A vacuum cleaner making loud noises or overheating can be alarming. If ignored, it may lead to motor burnout or permanent damage.
Causes:
- Blocked Airflow – Clogged filters or hoses force the motor to work harder, leading to vacuum cleaner overheating solutions.
- Worn-Out Bearings – If the vacuum produces a high-pitched or grinding noise, the motor bearings may be failing.
- Broken Fan or Motor Blades – Damaged internal components can cause excessive noise and overheating.
- Overfilled Dustbin – If the bin isn’t emptied regularly, the vacuum will overheat trying to pull air through a blocked chamber.
Fixes:
- Clean the filters and hose – Ensure proper airflow by removing blockages.
- Lubricate or replace motor bearings – If the noise is due to friction, applying lubricant can help.
- Inspect the fan and motor components – Replace any damaged parts.
- Empty the dustbin regularly – Keep the vacuum cleaner running efficiently by maintaining an empty bin.
Understanding these common vacuum cleaner problems and their causes can help users save money on repairs and keep their vacuum in top shape. Whether it’s a vacuum cleaner losing suction, overheating, or failing to turn on, these troubleshooting steps can address most issues.
2. Step-by-Step Troubleshooting Guide
When a vacuum cleaner stops working, it can be frustrating, but in many cases, the issue can be resolved without professional help. This vacuum cleaner repair guide will walk through a step-by-step troubleshooting process, helping users diagnose and fix common vacuum cleaner problems efficiently. By following these DIY vacuum cleaner repair techniques, one can restore suction power, fix electrical issues, and extend the vacuum’s lifespan.
2.1 Checking Power Supply and Connections
One of the most common reasons for a vacuum cleaner not working is a power issue. Before assuming a major fault, checking the power supply, connections, and electrical components can help identify the root cause.
Troubleshooting Steps:
- Check the power cord – Inspect for visible damage, fraying, or cuts. If the cord is damaged, a vacuum cleaner cord repair may be necessary.
- Test the outlet – Plug another device into the same outlet to confirm it’s functional.
- Reset the circuit breaker – If the vacuum caused a power surge, resetting the breaker may solve the issue.
- Inspect the on/off switch – A faulty power switch might prevent the vacuum from turning on.
- Examine internal wiring – Loose wires inside the vacuum can disrupt the electrical connection.
Fix:
- If the power cord is damaged, replacing it is the safest solution.
- If the on/off switch is broken, consult the user manual for a replacement guide.
- If wiring issues persist, professional repair may be needed.
2.2 Inspecting and Replacing the Vacuum Cleaner Belt
A vacuum cleaner brush roll fix is essential when the brush stops spinning. Most often, this is caused by a broken or stretched vacuum cleaner belt.
Signs of a Faulty Belt:
- The vacuum runs, but the brush roll doesn’t spin.
- A burning rubber smell while operating the vacuum.
- Visible wear or breakage on the belt.
Troubleshooting Steps:
- Turn off and unplug the vacuum – Never inspect moving parts while the vacuum is powered on.
- Access the brush roll compartment – Remove the bottom plate to expose the vacuum cleaner belt.
- Check the belt – If it’s loose, snapped, or worn out, replacement is necessary.
- Inspect the brush roll – Remove any tangled hair or debris that might prevent movement.
Fix:
- Replace the vacuum cleaner belt with a manufacturer-approved part.
- Reassemble the vacuum and test the brush roll to ensure proper function.
2.3 Cleaning or Replacing Vacuum Cleaner Filters
A vacuum cleaner losing suction is a common issue caused by clogged filters. Filters trap dust, dirt, and allergens, but when they become blocked, airflow is restricted, leading to vacuum cleaner suction issues.
Signs of a Dirty or Clogged Filter:
- Reduced suction power.
- Dust escaping from the vacuum exhaust.
- A musty smell when running the vacuum.
Troubleshooting Steps:
- Locate the filter – Most vacuums have pre-motor and HEPA filters. Check the user manual for placement.
- Remove the filter – Carefully take out the filter to inspect for dirt buildup.
- Clean the filter – If reusable, wash with warm water and let it dry completely before reinserting.
- Replace if necessary – If the filter is damaged or too dirty, replacing it is the best option.
Fix:
- Regularly clean and replace filters to maintain suction efficiency.
- Avoid using a wet filter inside the vacuum, as it can damage internal components.
2.4 Clearing Hose and Brush Roll Blockages
A vacuum cleaner hose repair is often needed when blockages prevent proper airflow. Clogged hoses can lead to vacuum cleaner overheating solutions and loss of suction power.
Signs of a Hose or Brush Roll Blockage:
- Weak suction or complete loss of airflow.
- The vacuum makes unusual noises, such as whistling or rattling.
- The brush roll struggles to spin despite a functional belt.
Troubleshooting Steps:
- Turn off and unplug the vacuum.
- Detach the hose – Remove the hose from both ends to check for blockages.
- Use a broomstick or compressed air – Gently push through the hose to dislodge debris.
- Inspect the brush roll – Manually rotate it to ensure it’s free from obstructions.
- Reassemble and test – Once the blockage is cleared, reconnect all parts and check suction power.
Fix:
- Regularly inspect and clean the vacuum cleaner hose and brush roll to prevent buildup.
- Avoid vacuuming large objects that can cause blockages.
2.5 Fixing a Malfunctioning Vacuum Cleaner Motor
A failing motor can cause vacuum cleaner noise problems or complete breakdown. If the motor struggles to run or emits a burning smell, it may need repair or replacement.
Signs of a Malfunctioning Motor:
- The vacuum powers on but doesn’t function correctly.
- A high-pitched or grinding noise while running.
- Overheating and automatic shut-off.
Troubleshooting Steps:
- Check airflow components – Blockages in the hose, filter, or brush roll can strain the motor.
- Listen for unusual sounds – Grinding or rattling noises indicate internal damage.
- Test motor voltage – Use a multimeter to check if the motor is receiving power.
Fix:
- If the motor is overheating, clean filters and remove blockages to reduce strain.
- If the motor is burned out, replacement is often the only option.
- If unsure, consider professional vacuum cleaner repair services.
This step-by-step troubleshooting guide provides essential fixes for common vacuum cleaner problems. Whether dealing with suction issues, motor failures, or clogged hoses, following these DIY vacuum cleaner repair tips can help restore performance and extend the vacuum’s lifespan.
3. Replacing or Repairing Broken Parts
Over time, even a well-maintained vacuum cleaner may develop mechanical failures or electrical issues that require part replacements. While some minor repairs can be done with simple DIY vacuum cleaner repair techniques, other components may need to be replaced entirely. This section will cover how to repair or replace essential vacuum cleaner parts, ensuring optimal performance and a longer lifespan for the appliance.
3.1 How to Replace a Vacuum Cleaner Motor
The vacuum cleaner motor is the heart of the appliance. If the motor fails, the vacuum won’t function at all. Replacing a broken motor can be more cost-effective than purchasing a new vacuum, especially if other components are still in good condition.
Signs of a Failing Motor:
- The vacuum cleaner makes a burning smell while in use.
- The motor produces a high-pitched whine or grinding noise.
- The vacuum doesn’t turn on despite a working power supply.
- The vacuum frequently overheats and shuts down.
Steps to Replace a Vacuum Cleaner Motor:
- Unplug the vacuum – Always ensure the appliance is disconnected from power before disassembly.
- Remove the casing – Unscrew the housing to access the vacuum cleaner motor.
- Disconnect wiring – Take a picture of the wiring before detaching the old motor to ensure proper reconnection.
- Install the new motor – Secure the replacement motor in place and reconnect the wires.
- Reassemble the vacuum – Ensure all screws and components are in place before testing the vacuum.
Fix:
- If the vacuum still doesn’t work after replacing the motor, check the wiring connections or consult a professional vacuum cleaner repair service.
3.2 Replacing a Vacuum Cleaner Belt and Brush Roll
The vacuum cleaner belt connects the motor to the brush roll, allowing it to rotate and lift dirt from surfaces. Over time, the belt can stretch, snap, or wear out, reducing cleaning efficiency.
Signs of a Broken or Worn-Out Belt:
- The vacuum cleaner brush roll is not spinning.
- The vacuum is making a loud noise but not picking up debris effectively.
- The belt appears loose or cracked upon inspection.
Steps to Replace a Vacuum Cleaner Belt:
- Turn off and unplug the vacuum.
- Remove the bottom plate – Use a screwdriver to open the vacuum’s brush compartment.
- Take out the brush roll – Carefully detach the brush roll to access the belt.
- Install the new belt – Place the belt around the brush roll and motor spindle, ensuring a snug fit.
- Reassemble and test – Put everything back in place and turn on the vacuum to check if the brush roll spins properly.
Fix:
- If the brush roll is jammed, clean out tangled hair and debris before replacing the belt.
- If the vacuum still fails to pick up dirt, check for vacuum cleaner suction issues or additional blockages.
3.3 Repairing or Replacing the Vacuum Cleaner Hose
A damaged or clogged vacuum hose can lead to loss of suction power, making it difficult to pick up dust and debris efficiently. A cracked or leaking hose should be replaced immediately, while minor blockages can be cleared with simple fixes.
Signs of a Damaged Hose:
- The vacuum cleaner losing suction or failing to pick up debris properly.
- Visible cracks or holes in the hose.
- A whistling noise when the vacuum is running.
Steps to Repair or Replace a Vacuum Cleaner Hose:
- Detach the hose – Remove the hose from the vacuum unit.
- Inspect for blockages – Use a flashlight to check for clogs inside the hose.
- Clear the obstruction – Push a broomstick or use compressed air to dislodge dirt and debris.
- Patch minor cracks – Small holes can be sealed with duct tape or a hose repair kit.
- Replace if necessary – If the damage is extensive, purchase a compatible replacement hose.
Fix:
- Regularly inspect the vacuum cleaner hose for early signs of wear and tear.
- Avoid vacuuming sharp objects that could puncture the hose.
Replacing or repairing broken vacuum cleaner parts can restore efficiency without the need for a costly new appliance. Whether it’s fixing a vacuum cleaner motor, replacing a vacuum cleaner belt, or repairing a clogged hose, these DIY vacuum cleaner repair techniques can significantly improve performance.

4. Preventative Maintenance Tips to Extend Vacuum Cleaner Lifespan
A well-maintained vacuum cleaner can last for years, providing optimal performance with minimal issues. Regular vacuum cleaner maintenance helps prevent breakdowns, enhances suction power, and improves energy efficiency. By following a routine maintenance checklist, homeowners can avoid costly repairs and ensure their vacuum cleaner works efficiently for a long time.
This section will explore the best preventative maintenance tips, including routine cleaning and best practices for vacuum cleaner longevity to keep the appliance in top shape.
4.1 Routine Cleaning and Maintenance Checklist
Regular vacuum cleaner maintenance is key to preventing common vacuum cleaner problems like loss of suction, overheating, and motor failure. A simple cleaning schedule can help maintain efficiency while prolonging the vacuum’s lifespan.
Daily or After-Use Maintenance:
- Empty the dustbin or replace vacuum bags – A full bag or dustbin can reduce suction power, causing strain on the motor.
- Inspect the brush roll – Remove tangled hair, threads, and debris to prevent blockages.
- Check for clogs – Regularly inspect the vacuum cleaner hose and airflow channels for blockages.
Weekly Maintenance:
- Clean or replace the vacuum filter – A clogged filter can reduce suction and increase dust emissions. Many vacuums have HEPA filters, which should be cleaned or replaced as needed.
- Examine the power cord and plug – Look for any frays or damage that could lead to electrical issues.
- Check the belt and brush roll – Ensure the belt is intact and the brush roll spins freely.
Monthly Maintenance:
- Wash the filters – If the vacuum has washable filters, rinse them with warm water and let them dry completely before reinserting.
- Inspect the vacuum wheels – Debris or hair wrapped around the wheels can affect movement.
- Clean the vacuum’s exterior – Wipe down the body and attachments to remove dust buildup.
Yearly Maintenance:
- Deep clean the vacuum cleaner – Disassemble key components for a thorough clean, including the hose, brush roll, and filter compartments.
- Replace worn-out parts – If the vacuum cleaner belt looks stretched or frayed, replace it immediately.
- Check the motor performance – If the vacuum makes unusual noises or loses power, it may require a vacuum cleaner motor repair or replacement.
Fix:
- Following a vacuum cleaner maintenance checklist ensures efficiency and prevents vacuum cleaner overheating solutions.
- Avoid overloading the vacuum with large debris, as this can clog the system and reduce suction power.
4.2 Best Practices for Vacuum Cleaner Longevity
In addition to regular vacuum cleaner maintenance, adopting best practices can help extend the appliance’s lifespan. Small adjustments in how a vacuum is used and stored can prevent wear and tear, improving overall performance.
Use the Vacuum Properly:
- Adjust settings based on flooring type – Using the correct height adjustment prevents damage to both the vacuum and the flooring.
- Avoid vacuuming wet surfaces – Unless using a wet/dry vacuum, moisture can damage the motor and filters.
- Don’t overfill the dustbin or bag – An overfilled vacuum bag reduces efficiency and increases strain on the motor.
Proper Storage and Handling:
- Store in a dry, cool area – Humidity can cause electrical components to deteriorate.
- Wrap the cord properly – Avoid pulling or stretching the cord, which can cause electrical damage.
- Keep attachments organized – Properly storing hoses and accessories prevents breakage.
Preventive Repairs:
- Replace worn belts and filters on time – A stretched vacuum cleaner belt or clogged filter can reduce performance.
- Check for unusual noises – Grinding or squeaking sounds may indicate a vacuum cleaner motor repair is needed.
- Clean or replace the vacuum hose – A clogged vacuum cleaner hose affects suction power.
Fix:
- Investing in vacuum cleaner maintenance reduces the need for frequent vacuum cleaner repairs.
- Regularly inspecting components ensures vacuum cleaner suction issues are caught early before they become major problems.
By following these preventative maintenance tips, homeowners can extend the lifespan of their vacuum cleaner, improve suction efficiency, and reduce the risk of breakdowns. A combination of routine cleaning, proper usage, and timely repairs ensures that the vacuum remains in optimal working condition for years to come.
5. When to Seek Professional Help for Vacuum Cleaner Repairs
While DIY vacuum cleaner repair can resolve many common issues, some problems require expert intervention. Attempting to fix complex vacuum cleaner motor repairs, electrical issues, or severe mechanical failures without the right knowledge can result in further damage. Knowing when to seek professional vacuum cleaner repair services can save time, effort, and potentially costly replacements.
In this section, we will cover the signs that indicate professional repair is needed and how to choose the right repair service for a broken vacuum cleaner.
5.1 Signs That Indicate You Need Professional Vacuum Repair
While many vacuum cleaner problems can be resolved with routine maintenance or DIY troubleshooting, certain issues require professional expertise. Here are the most common warning signs:
1. Electrical Failures and Power Issues
- The vacuum cleaner won’t turn on even after checking the power supply.
- Frequent overheating and automatic shutdowns, even after cleaning the filters.
- Burning smells or smoke coming from the motor or electrical components.
- Loose or frayed wires, which pose a potential safety hazard.
⚡ Fix: Electrical issues often stem from a damaged motor, a faulty power switch, or internal wiring problems. In such cases, a vacuum cleaner motor repair should be handled by a professional technician.
2. Persistent Suction Loss
- The vacuum still experiences suction issues after cleaning the filters, hose, and brush roll.
- Unusual whistling or hissing noises, indicating a potential air leak.
- A broken or detached vacuum cleaner hose that affects airflow.
⚡ Fix: A professional repair service can inspect for cracked vacuum hoses, damaged internal seals, or motor-related suction problems that DIY solutions cannot fix.
3. Strange Noises or Mechanical Failures
- The vacuum cleaner makes grinding, rattling, or clicking sounds while in use.
- The brush roll won’t spin, even after replacing the belt.
- There is visible smoke or sparks when operating the vacuum.
⚡ Fix: If the brush roll isn’t spinning after a belt replacement, the issue could stem from motor failure or a damaged internal gear mechanism. A professional technician can diagnose and repair these complex mechanical issues.
4. Vacuum Cleaner Overheating Frequently
- The vacuum shuts off unexpectedly due to excessive heat.
- Overheating persists even after cleaning the filters and removing clogs.
- The motor area is extremely hot to the touch.
⚡ Fix: A vacuum that overheats frequently may have a failing motor, blocked cooling vents, or a malfunctioning thermal fuse. A professional vacuum cleaner repair service can determine if motor replacement is necessary.
5. You’ve Tried DIY Repairs but the Problem Persists
- The vacuum still loses suction even after replacing the filters and clearing clogs.
- The brush roll doesn’t spin, even after vacuum cleaner belt replacement.
- The vacuum doesn’t turn on, despite checking the power supply and connections.
⚡ Fix: If DIY troubleshooting doesn’t work, it’s time to consult an expert to avoid worsening the problem.
5.2 How to Choose the Right Vacuum Cleaner Repair Service
When selecting a professional repair service, it’s important to ensure they are reliable, experienced, and capable of handling the specific vacuum cleaner brand and model. Here’s what to look for:
1. Check Reviews and Recommendations
- Look for customer reviews and ratings online to gauge service quality.
- Ask for recommendations from friends or family who have had vacuum cleaner repairs done.
- Search for service centers authorized by your vacuum cleaner brand.
✅ Pro Tip: Reputable repair services will have clear pricing, positive feedback, and experienced technicians who specialize in different vacuum models.
2. Compare Repair Costs vs. Buying a New Vacuum
- If repair costs exceed 50% of the price of a new vacuum, consider replacing it.
- Minor repairs (like belt replacements, clogged hoses, or filter changes) are usually worth fixing.
- Vacuum motor replacements can be costly, so weigh the cost-benefit before proceeding.
✅ Pro Tip: If the vacuum cleaner is older than 7-10 years, replacement may be a more cost-effective solution.
3. Ask About Service Warranties
- A good repair service will offer a warranty on parts and labor.
- Check whether vacuum cleaner motor repairs, belt replacements, and electrical fixes are covered.
✅ Pro Tip: A warranty-backed repair service ensures reliability and guarantees quality workmanship.
4. Ensure They Handle Your Vacuum Brand
- Not all repair services are authorized to work on every vacuum brand.
- Some brands, such as Dyson, Shark, Hoover, and Miele, may require specialized repairs.
✅ Pro Tip: Manufacturer-certified repair shops have access to genuine vacuum cleaner parts and brand-specific expertise.
5. Check Turnaround Time and Availability
- Some services offer same-day or 24-hour repairs, while others may take a week or more.
- If you rely on your vacuum cleaner daily, look for a quick repair service.
✅ Pro Tip: Call ahead and ask about estimated repair time before bringing in your vacuum.
While many vacuum cleaner repairs can be handled with DIY solutions, knowing when to seek professional help can save time and money. Electrical issues, motor failures, and persistent mechanical problems require expert handling to prevent further damage.
By following these tips, homeowners can choose a reliable vacuum cleaner repair service, compare costs, and decide whether to repair or replace their appliance. Regular maintenance and timely repairs will ensure that the vacuum cleaner stays in top working condition for years.
6. Frequently Asked Questions (FAQs) About Repairing a Broken Vacuum Cleaner
When a vacuum cleaner stops working, many users wonder whether they should attempt DIY vacuum cleaner repair or seek professional vacuum cleaner repair services. Below are some of the most commonly asked questions about troubleshooting, repairing, and maintaining a vacuum cleaner.
6.1 Why is my vacuum cleaner losing suction, and how can I fix it?
A vacuum cleaner losing suction is one of the most common problems. Here are possible causes and solutions:
- Clogged filters: Wash or replace vacuum cleaner filters regularly.
- Blocked hose or brush roll: Remove debris and hair buildup.
- Full vacuum bag or dustbin: Empty the bag/bin and clean it thoroughly.
- Cracked or loose hose: Inspect for leaks and replace if necessary.
🛠 Fix: If none of these solutions restore suction, it may be a motor problem, requiring vacuum cleaner motor repair by a professional.
6.2 How do I troubleshoot a vacuum cleaner that won’t turn on?
If a vacuum cleaner won’t turn on, consider these potential causes:
- Power supply issues: Check if the power cord is plugged in and test a different outlet.
- Blown fuse or tripped circuit breaker: Reset the fuse or breaker.
- Damaged power cord: Look for frayed wires and replace if necessary.
- Overheating shutdown: Let the vacuum cool down before trying again.
🛠 Fix: If troubleshooting doesn’t work, the issue may be with the vacuum cleaner motor or wiring, which requires professional repair.
6.3 How often should I replace vacuum cleaner belts, filters, and other parts?
Regular vacuum cleaner maintenance ensures longevity. Here’s when to replace key components:
- Vacuum cleaner belt: Every 6-12 months or sooner if broken.
- Filters: Wash every 2-3 months and replace every 6-12 months.
- Brush roll: Replace when worn out or if the brush roll won’t spin properly.
- Vacuum cleaner motor: Only replace if repair costs exceed 50% of the vacuum’s price.
🛠 Fix: Following a vacuum cleaner maintenance checklist will help avoid unexpected breakdowns.
6.4 Can I replace the vacuum cleaner motor myself?
Replacing a vacuum cleaner motor requires technical skills. Consider these factors:
- Warranty coverage: DIY repair may void the warranty.
- Complexity: Some vacuum cleaner motor repairs involve delicate electrical work.
- Cost vs. replacement: If the repair cost is too high, it may be better to buy a new vacuum cleaner.
🛠 Fix: Unless experienced with electrical repairs, it’s safer to seek professional vacuum cleaner repair services.
6.5 How can I prevent my vacuum cleaner from breaking down?
Preventative vacuum cleaner maintenance extends its lifespan. Follow these tips:
- Clean filters and hoses regularly to prevent suction loss.
- Check the vacuum belt and brush roll for wear and replace when needed.
- Avoid overheating by letting the vacuum cool after long use.
- Store the vacuum properly in a dry place to prevent electrical damage.
🛠 Fix: Regularly following a vacuum cleaner maintenance checklist prevents common failures and costly repairs.
Conclusion: Keeping Your Vacuum Cleaner in Top Condition
A well-maintained vacuum cleaner is essential for keeping a home clean and dust-free. By following the right vacuum cleaner maintenance checklist, users can avoid common issues such as losing suction, overheating, or experiencing a vacuum cleaner that won’t turn on. Many vacuum cleaner repairs can be handled with simple troubleshooting steps, including checking the filters, belts, brush rolls, and hoses. However, for more complex problems like vacuum cleaner motor repair, it may be necessary to seek professional vacuum cleaner repair services.
Regularly cleaning vacuum filters, replacing worn-out belts, and ensuring the vacuum brush roll spins properly will not only improve performance but also extend the vacuum cleaner lifespan. When parts become damaged beyond repair, timely vacuum cleaner belt replacement or vacuum cleaner motor replacement can prevent more significant breakdowns.
For those who enjoy DIY vacuum cleaner repair, having the right tools and knowledge can make the process easier. However, in cases where troubleshooting doesn’t solve the problem, it’s best to consult an expert to avoid further damage.
By implementing these preventative maintenance steps and knowing when to seek professional vacuum cleaner repair, users can ensure their vacuum cleaner remains efficient and functional for years. Whether it’s routine maintenance or fixing a broken part, staying proactive will save time, money, and frustration.
With these practical solutions, anyone can confidently repair a broken vacuum cleaner and keep it running smoothly for optimal performance!